
Nimbella and Netflify Integration
The serverless approach is evolving towards an ecosystem of interconnected services in the cloud, where each service does its part at best and cooperate smoothly with other services.
Nimbella is very strong in providing Server Side functions. One of its innovations is the ability to code in the “serveless” but developing maintaining a state. It is generally a good solution for all your API and geric backend needs.
Nimbella also offers an integrated solution for deploying front-end code, acting as a single shop to deliver a full serverless applications. Nonetheless, there are other providers offering additional services when it comes to deploying the front-end part. For example, Netlify.
Netlify and static site generation
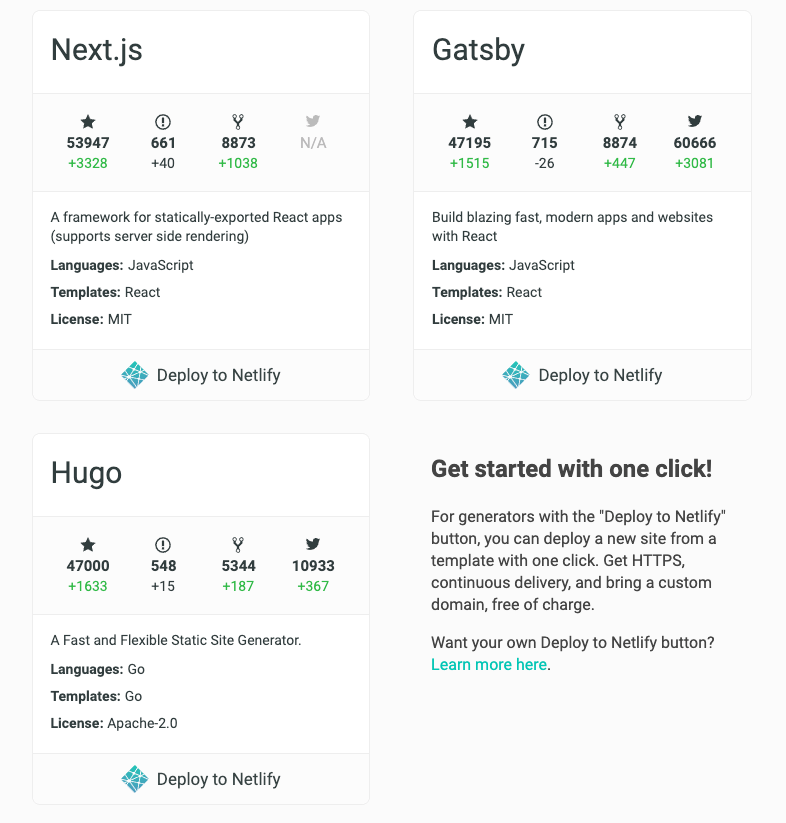
Netlify is specialized in deploying static web sites. It integrates well with Git as a content storage. It has a good support for static sites generators, and there are lots of them around. I can mention for example Jekyll, Gatsby, Hugo and many others.
To use a static site generator, you generally need to run it locally, and edit your content in some textual format, like markdown or asciidoc. Once you wrote your content, you execute a build step to generate actual HTML/CSS/JavaScript code and then upload the resulting web assets to some form of web storage.
The procedure is complex enough to make sense for some service provider to do the work for you. Netlify is one of those providers. Indeed the GitHub repository of many static website generators includes sample sites with a button “Deploy to Netlify”.
What this button does? It creates forks the git repo of the sample creating a new repo where to store your content, then automatically builds and deploys the sample site in Netlify servers. Netlify uses their accumulated knowledge of how static site generators works to automate all the build steps for you.
In short, if you click on one of those buttons, Netlify will deploy the sample website in their systems. Netlify offers a free tier so for a personal blog it is basically free, you have to pay only if your site reaches a large number of visitors and page views.
Static sites are awesome for documentation, company profiles or blogs, but definitely this does not cover all the possible uses cases for a website. Basically, all the interesting web applications are dynamic in nature, they needs server side functions to keep a state. Here is where Nimbella shines.
When you combine the power of Netlify to deploy the front-end code with Nimbella ability to create server side stateful backend APIs, you are on on the path to build large web applications and websites completely serverless.
A stateful application on Nimbella and Netlify
There are plenty of static website genator with a “Deploy on Netlify” button available, so if want to setup your blog, all you need is to pick one, deploy it, then edit the content, either manually using a text editor or one of the many available online editors that lets you to directly edit a git repository.
However, there are not so many examples of a full, stateful serverless applications including a backend and a frontend that you can deploy on Netlify that is both stateful and serverless. So I developed one.
My example is a personal bookmark manager, an application that vaguely resembles a personal version of the now defunct del.icio.us website. I called it nimbelicious.
Its key feature is being stateful application, in order to demonstrate the power of Nimbella Serverless, but it also has a significant front-end that needs to be built, leveraging Netlify power in automating front-end automation deployment. You can see the application in Figure 1.
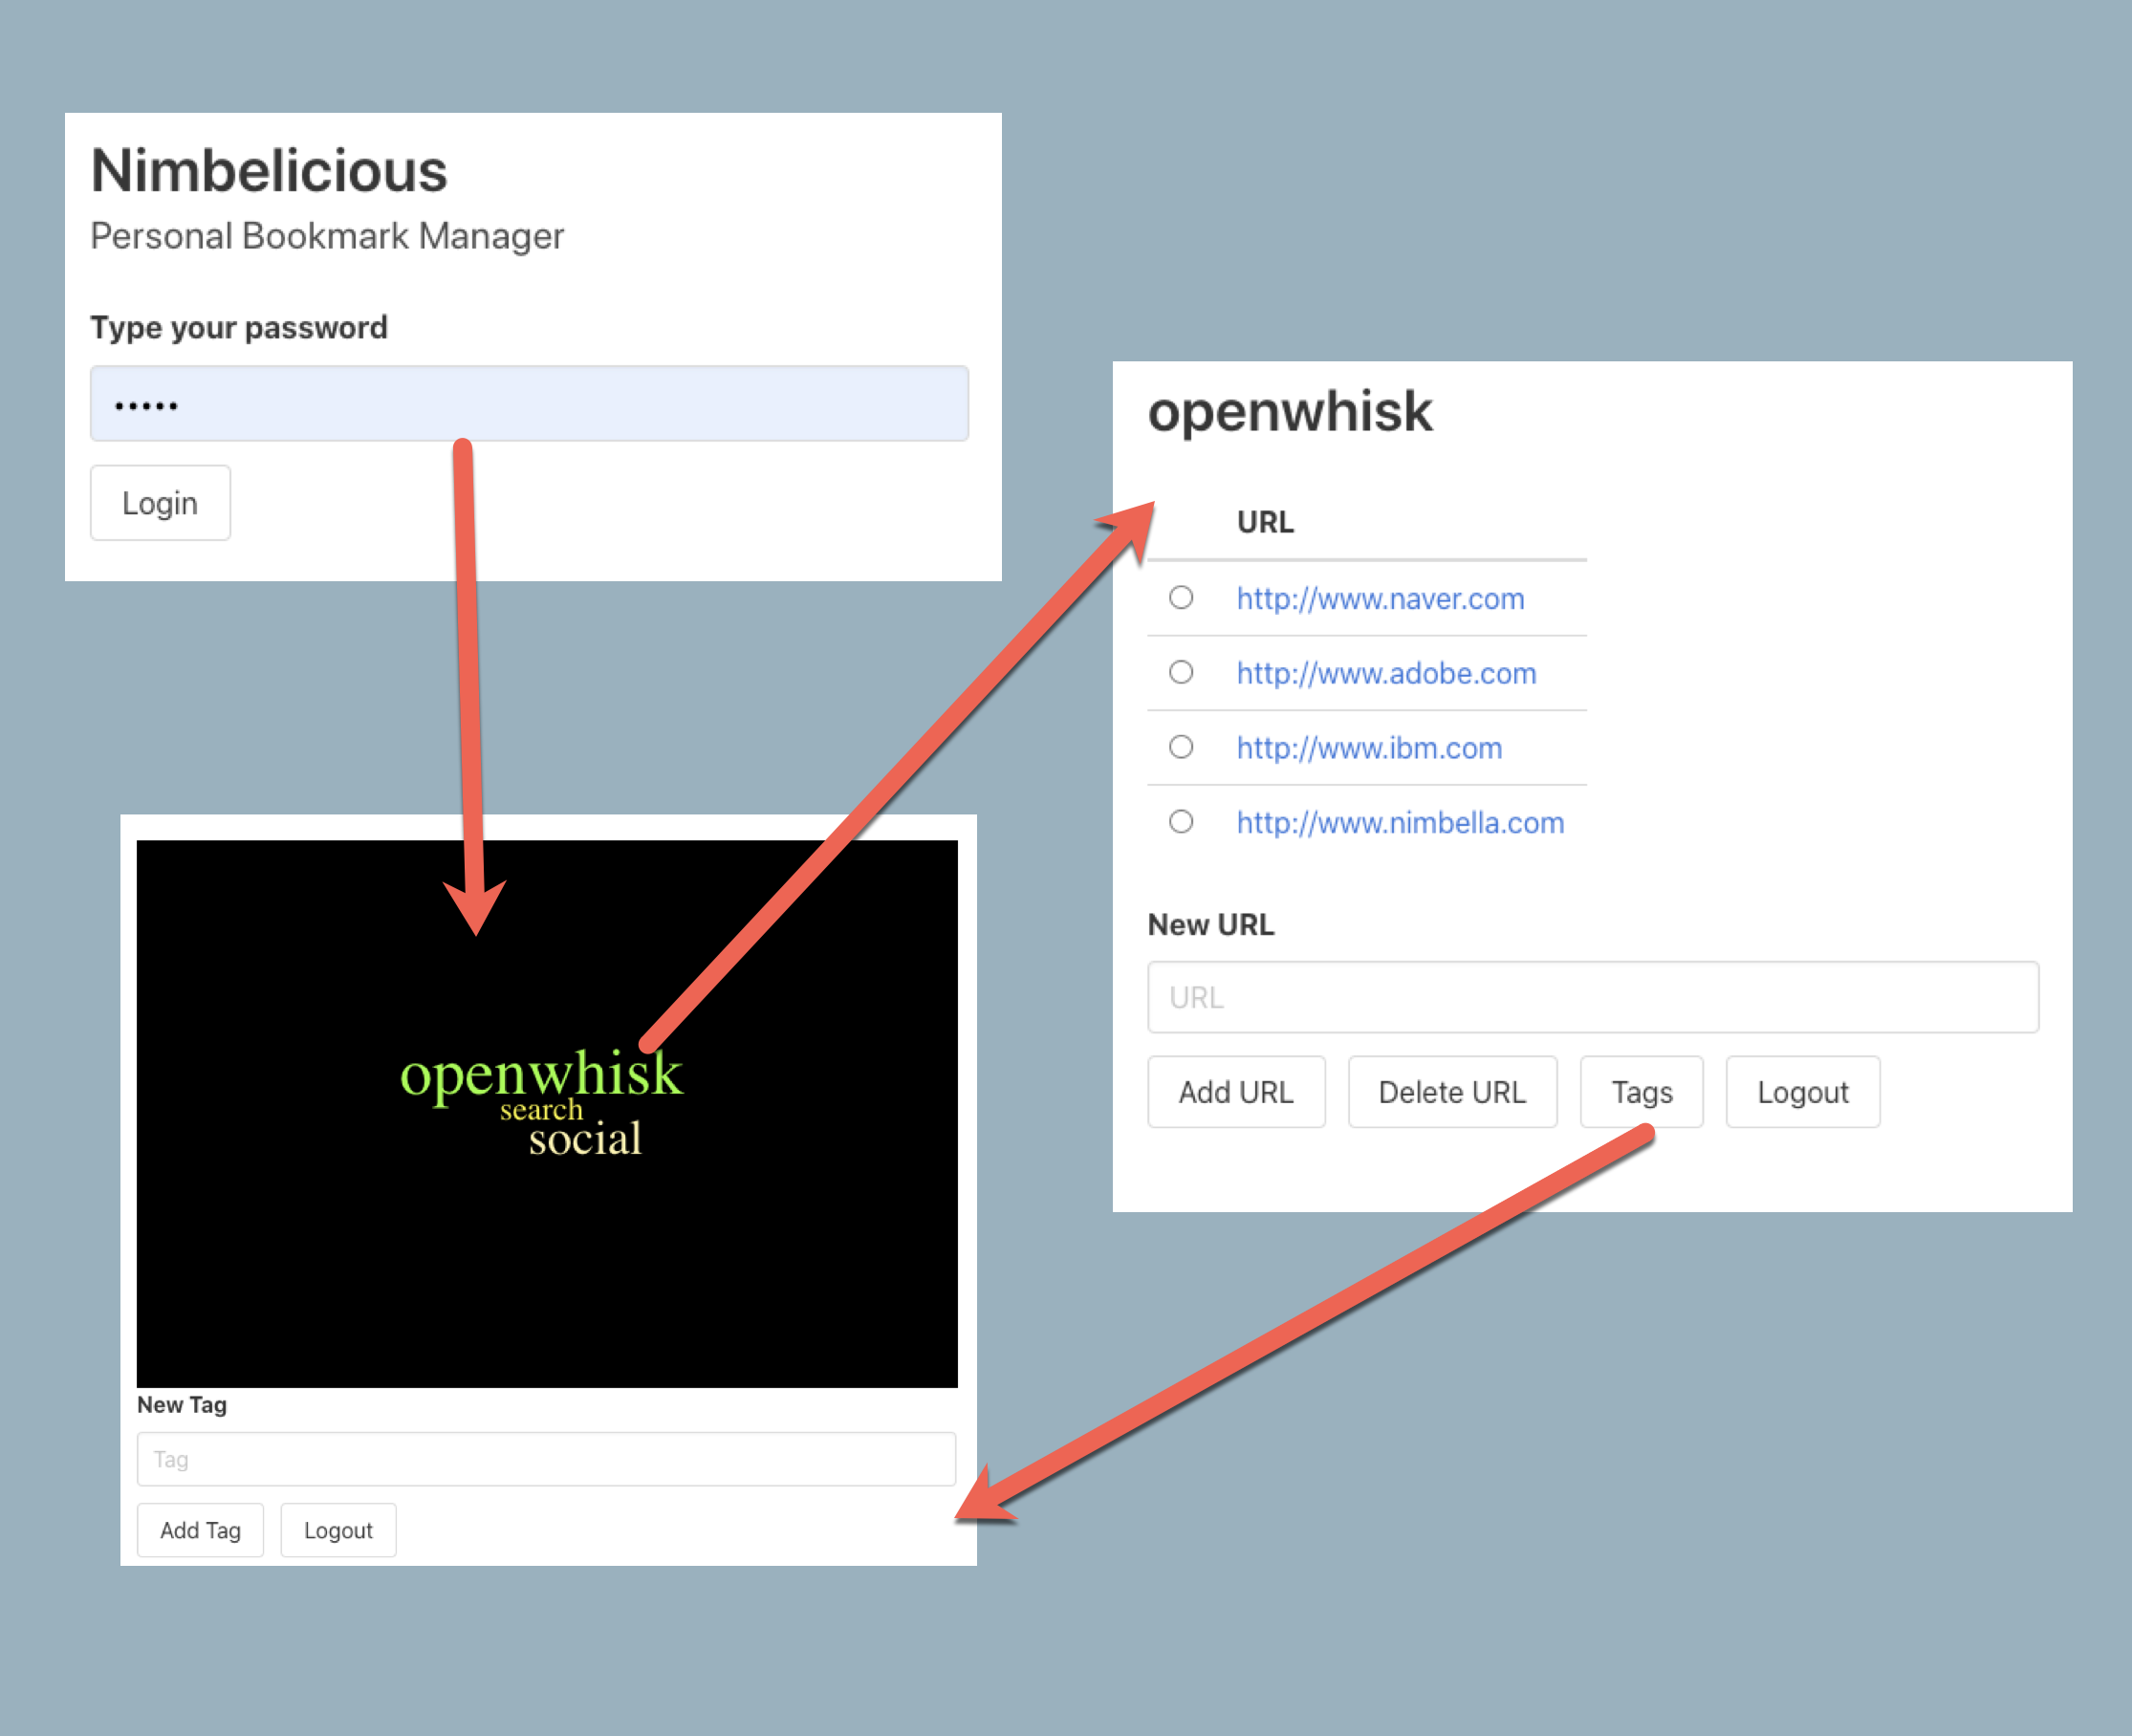 Figure 1
Since it is a personal bookmark manager, it is password protected. This is a first statefulness requirement. In general you cannot have an application password protected accessible from multiple locations using only client side code (well, unless you include the password in the client code, that is not a great solution). In our application, password is stored on the server and authentication is performed on the server, generating a token.
If you deploy the application, you get your unique URL to access it, using your password and keeping your data in it. There is no username as it is supposed to be single user. However it can be accessed by multiple devices, so data is definitely stored in the cloud, not in your local brower.
As you can see in the Figure 1, after the login page it shows a tag cloud, allowing to add more tags. Selecting a tag shows a list of URLs. Then you can add more URLs (and remove them, of course).
The nice thing is that you can deploy this application for you personal use on Netlify and Nimbella. Given the expected usage for such a personal bookmark manager is not high, you can use it with the free tier of both Nimbella and Netflify.
In the process, you can get a glimpse of the future of serverless. This approach of deploying applications in the cloud is becoming more and more widespread.
How to deploy
Let me describe now how to deploy Nimbelicious. First, note that both Nimbella and Netlify authenticate against GitHub. Furthermore, Netlify expects you are going to keep your content in git, and forks a repo on GitHub when you create a new website, so you need a GitHub account as a prerequisite. I assume here you already; if you are already logged in, you will use automatically. In Figure 2 there is an diagram of the steps required to deploy our application.
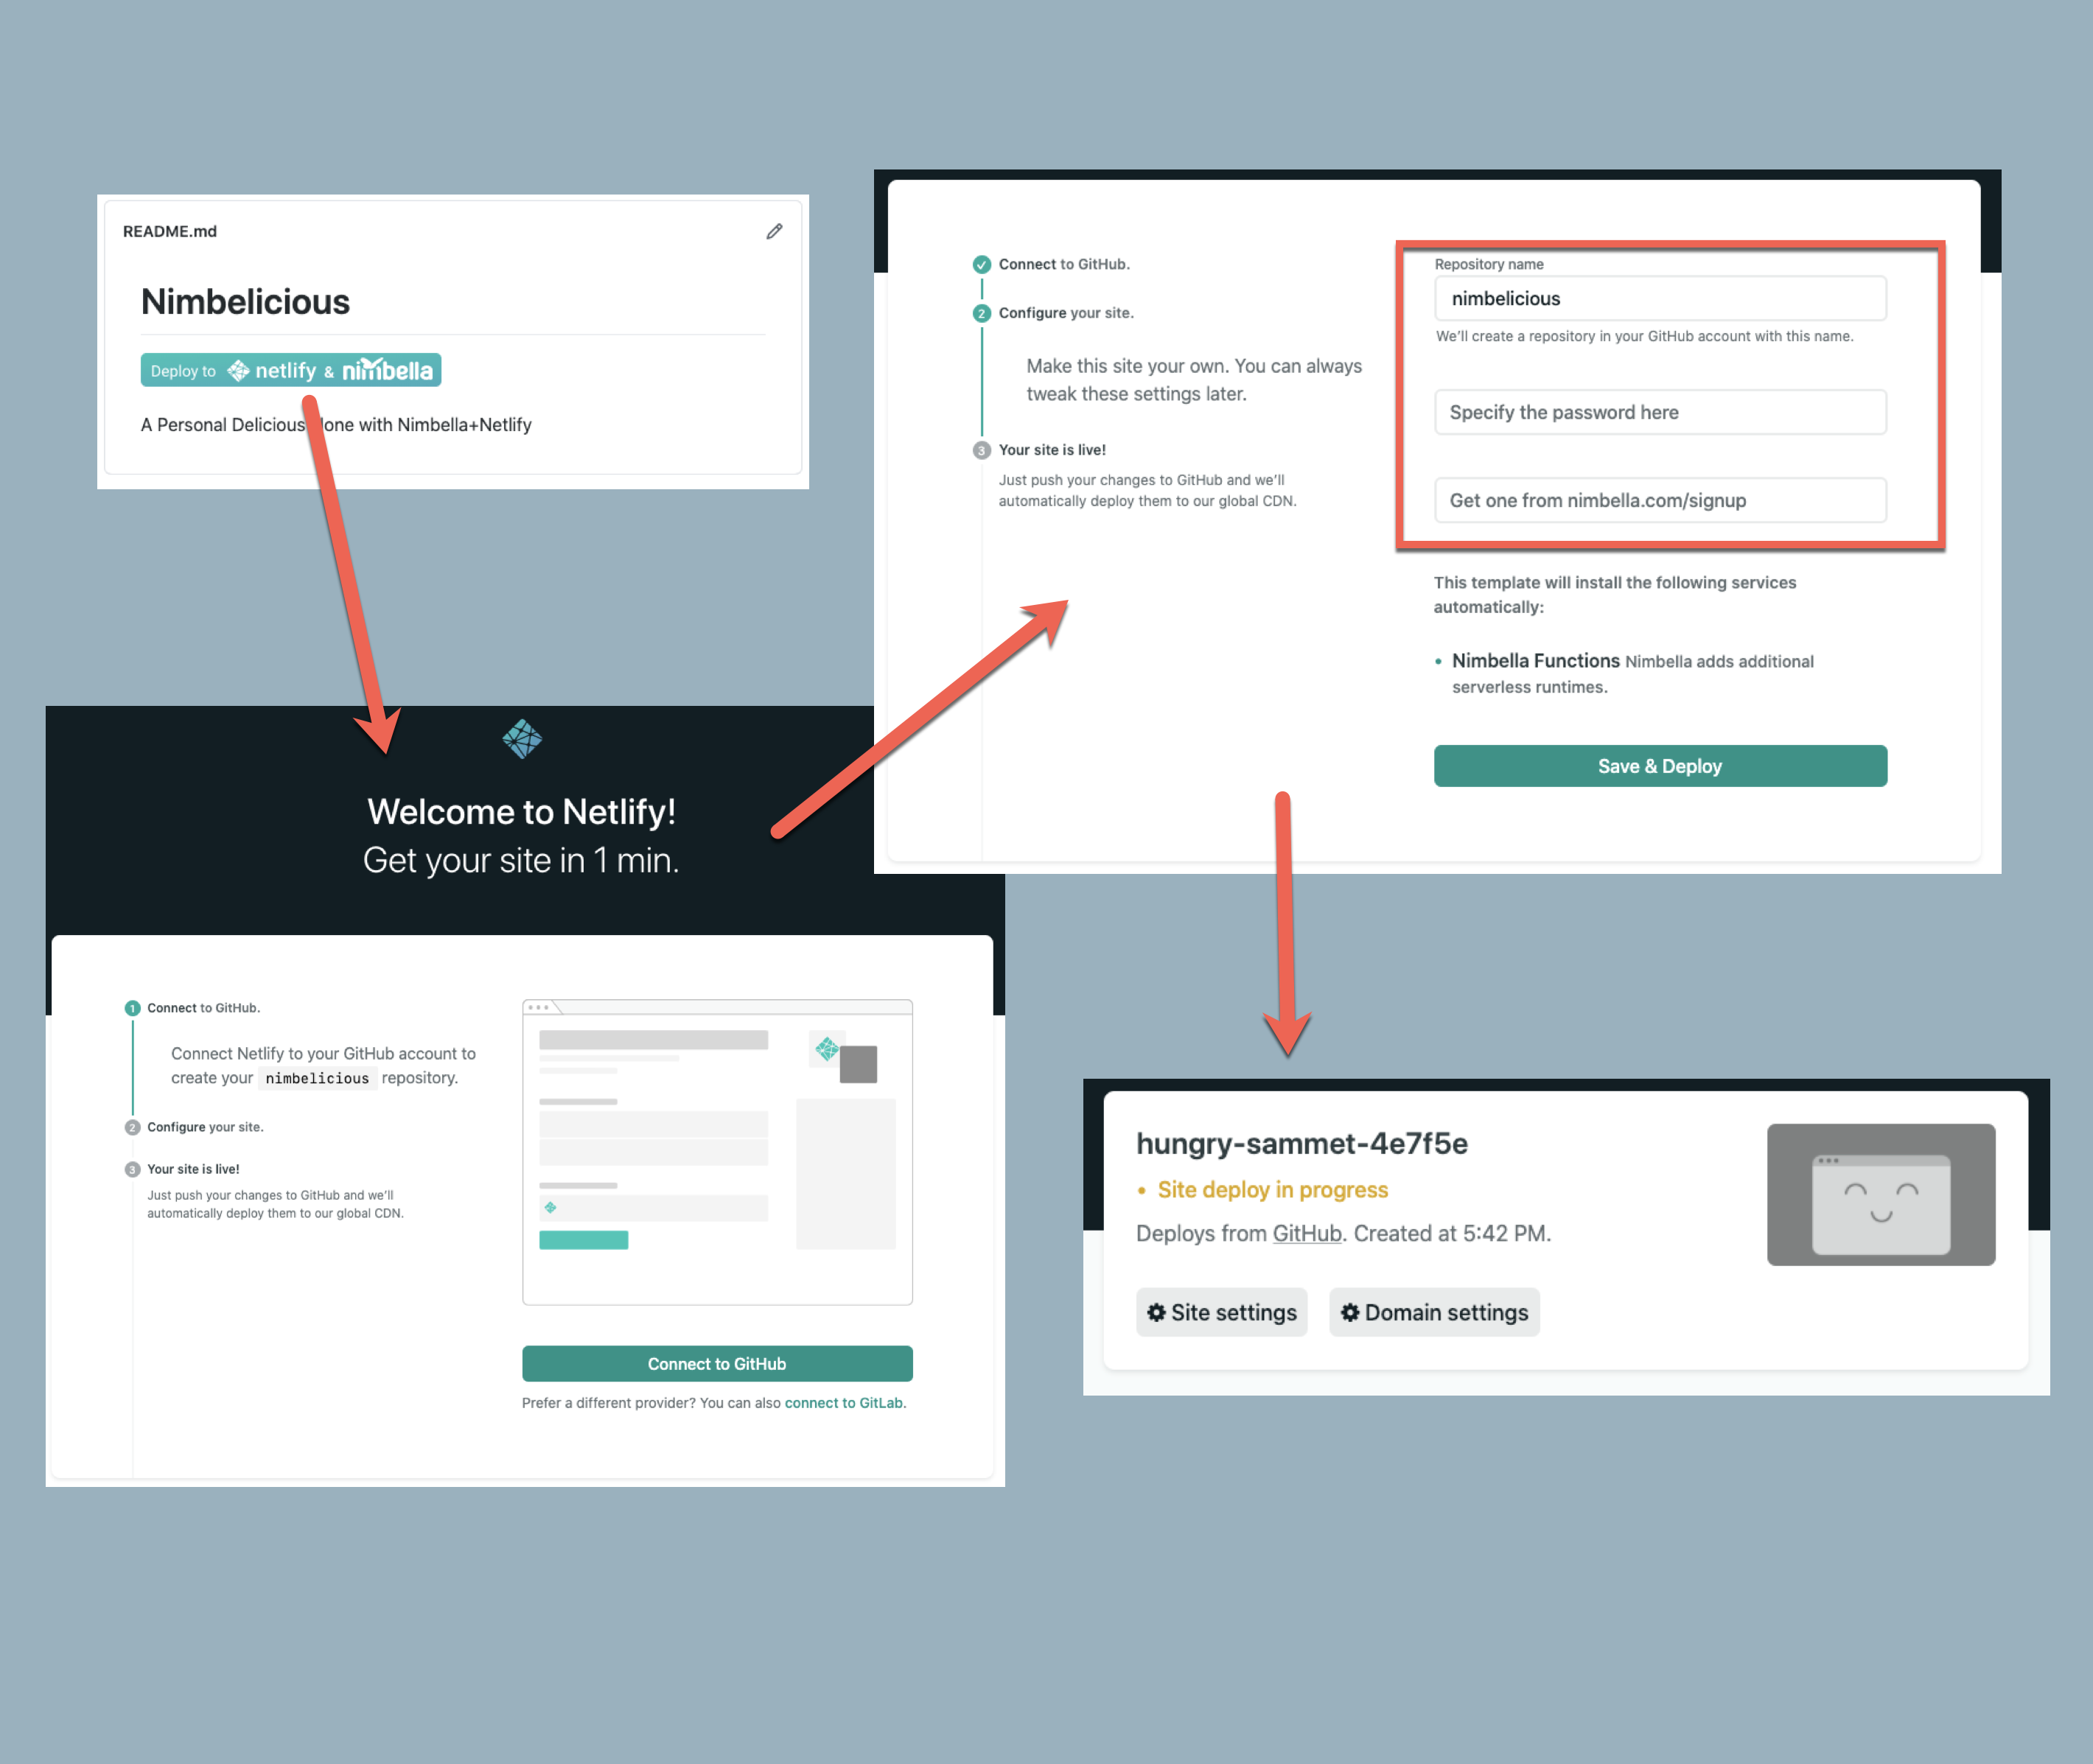 Figure 2
You should go to the Nimbelicious GitHub repo and click on the button Deploy to Netlify+Nimbella.
It will open a page in the Netlify portal in order to configure your new website. If you click “Connect to GitHub” it will proceed authenticating against GitHub and fork the code. In Netlify logic, a git repository is essential since it is where you are expected to stores your content.
In the second step, Netlify asks for configuration parameters. Nimbelicious is configured to ask for two piece of informations. One is the password to protect you Bookmark Manager. Pick the one you prefer, it is up to you to choose one.. The second information required is a Nimbella Login Token. This one must be obtained as described in the following paragraph. Once you have it, paste it in the field, click on “Save and Deploy” and you are done. Netlify builds the website; in the process also deploys Nimbella actions.
Getting a Nimbella login token
Currently, you need to register in Nimbella to get an account able to save state. In the future this step may be automated, but currently you have to register in Nimbella to get a login token, so you have to follow the procedure in Figure 3 to get it.
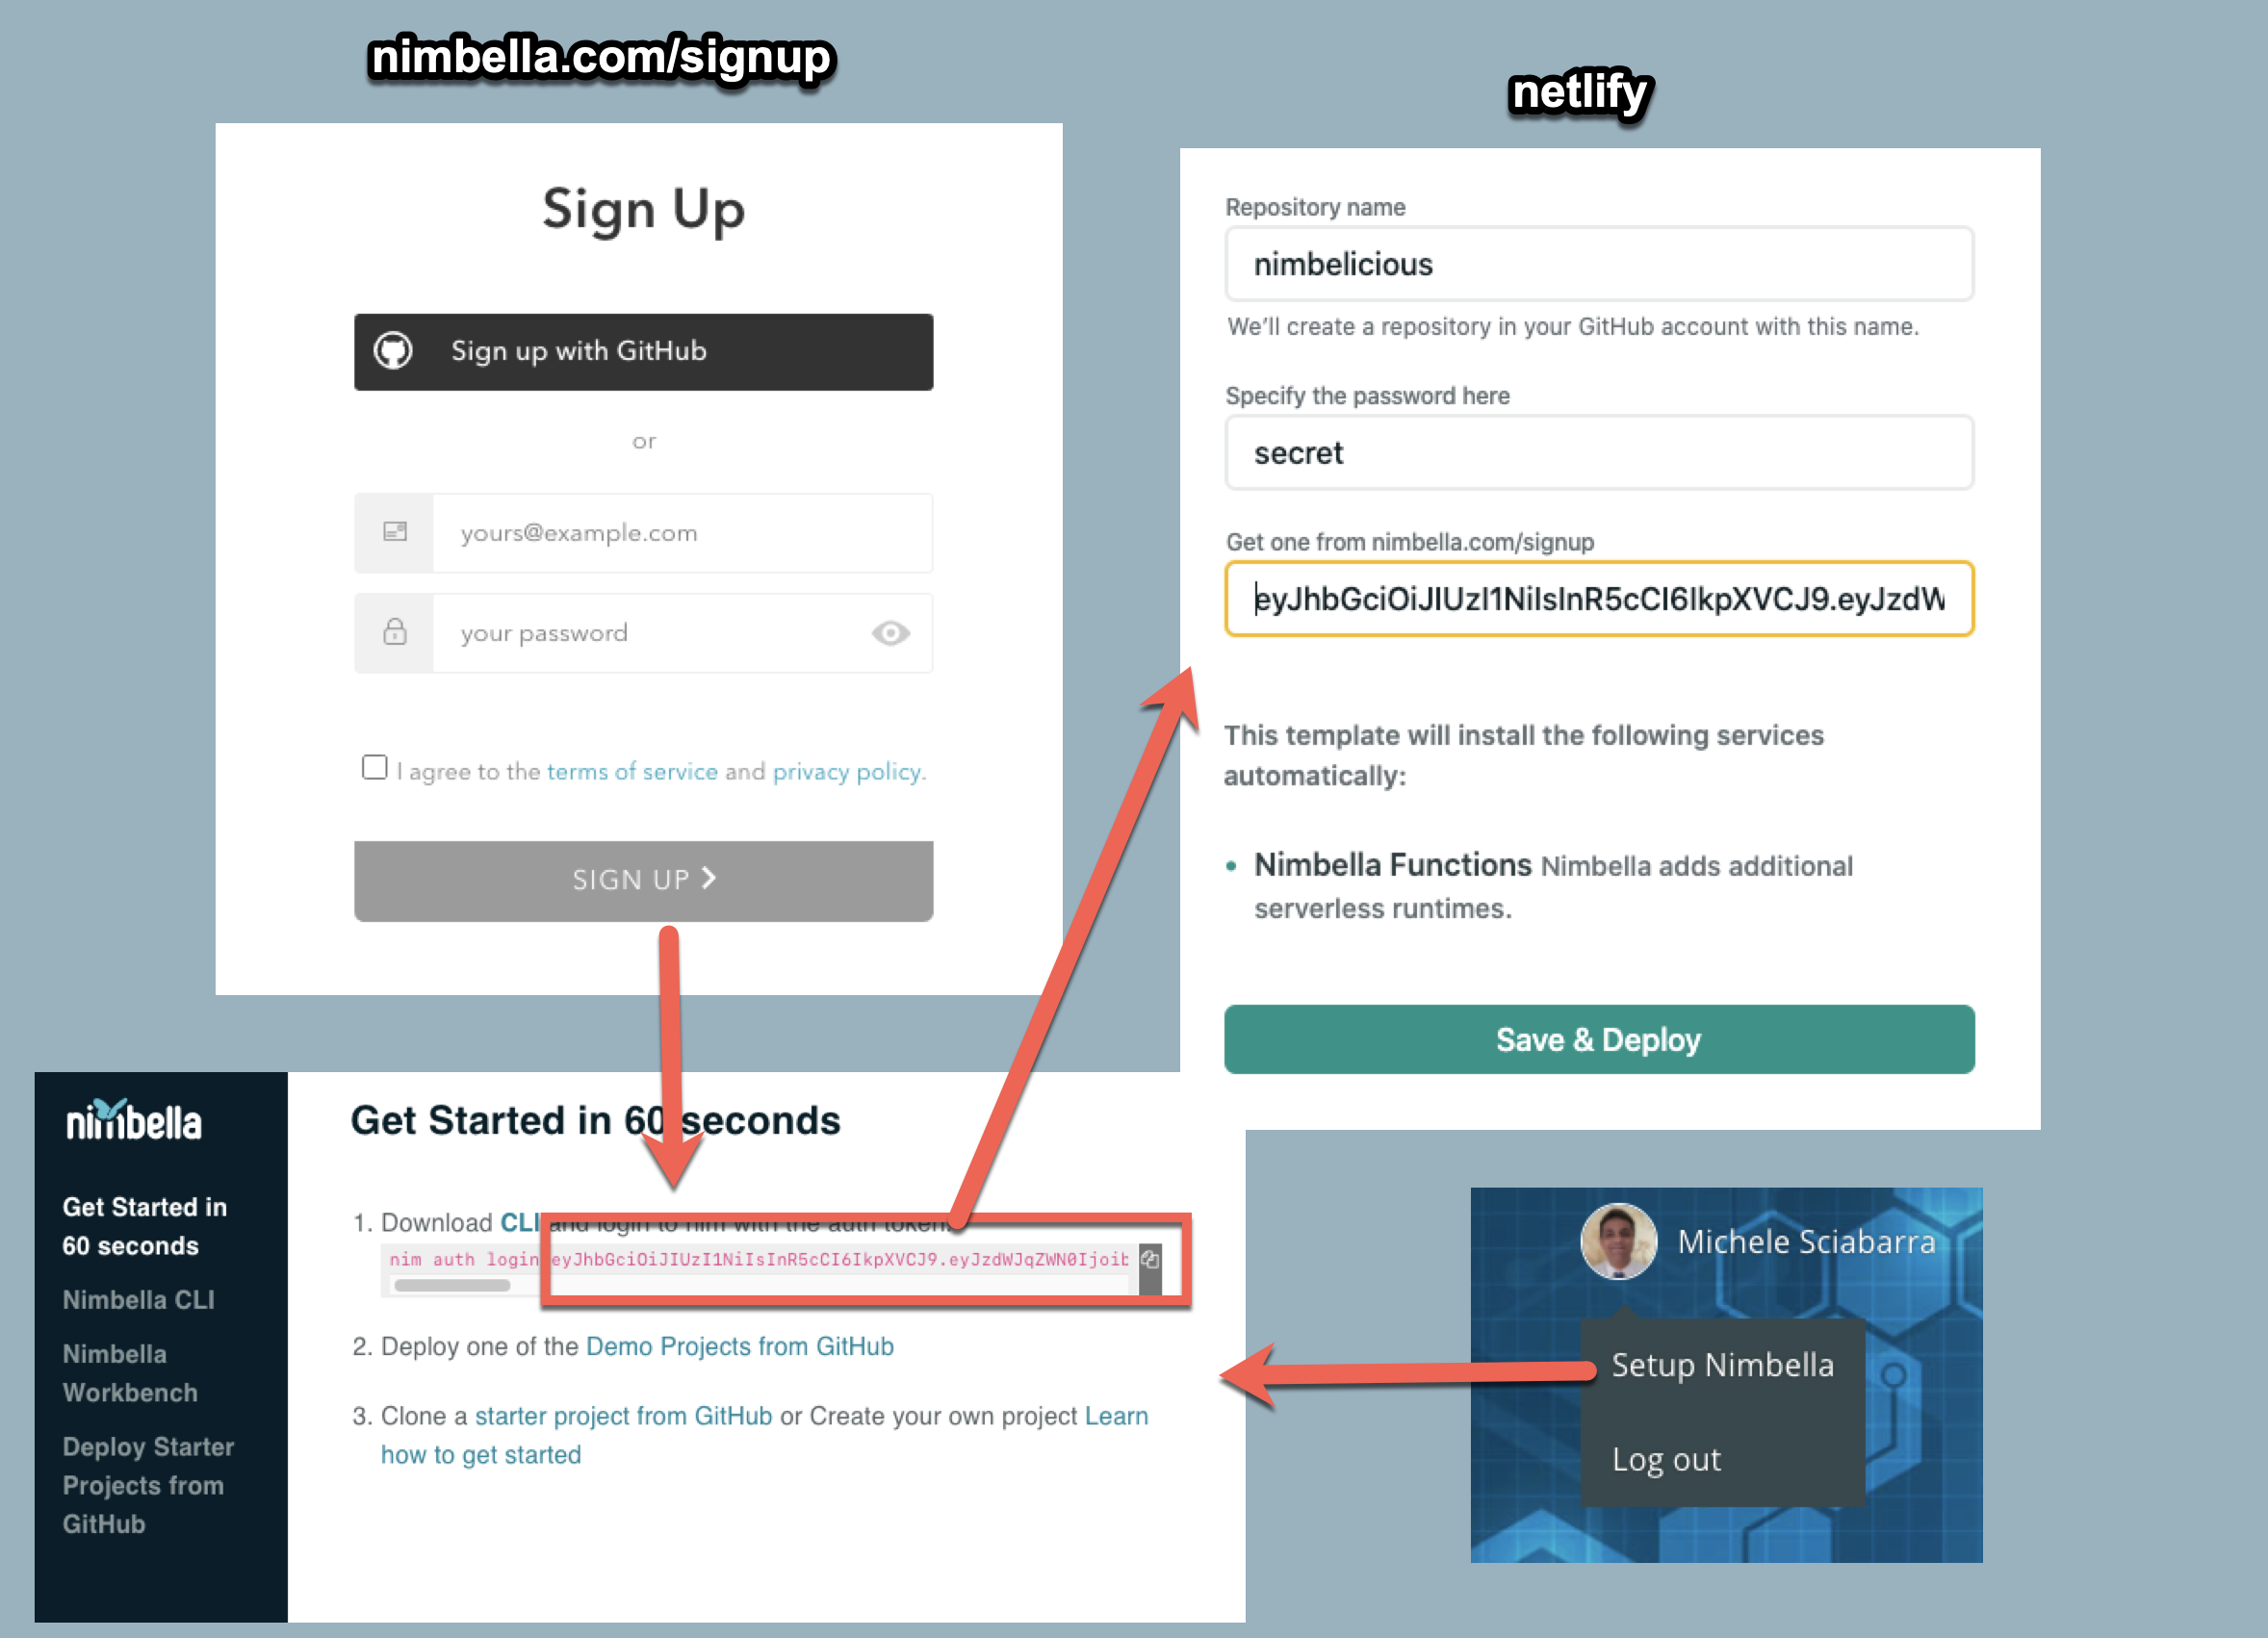
Without closing the browser window showing Netlify, open another tab and go on nimbella.com/signup. You can register here to get a free Nimbella account; the account also includes redis to store data. After registering, you reach the page Getting Started in 60 Seconds. If you are already registered, you can go to this page just opening the menu below your avatar, and selecting “Setup Nimbella”.
Here you can see the full a command to log into Nimbella in the form nim auth login <token>. You need to copy only the <token> part. It usually starts with ey. Once you copied it, you can paste it back in the Netfly screen asking for the token and complete your deployment.
What happens now?
After you deployed your application, Netlify starts a build. It will checkout the source code of the application, setup an appropriate environment, download the required dependencies and deploy the website in their servers, also adding load balancers and dns servers. In our case it is going to deploy both the front-end assets and the backed-end actions. After a (short) while you will get your new shiny website in Netlify talking with backend serverless functions in Nimbella.
Once deployed Netflify will assign a random website name, something like happy-einstein-eac396.netlify.app. You can configure the website as shown in Figure 4 as the generated name may not be easy to remember.
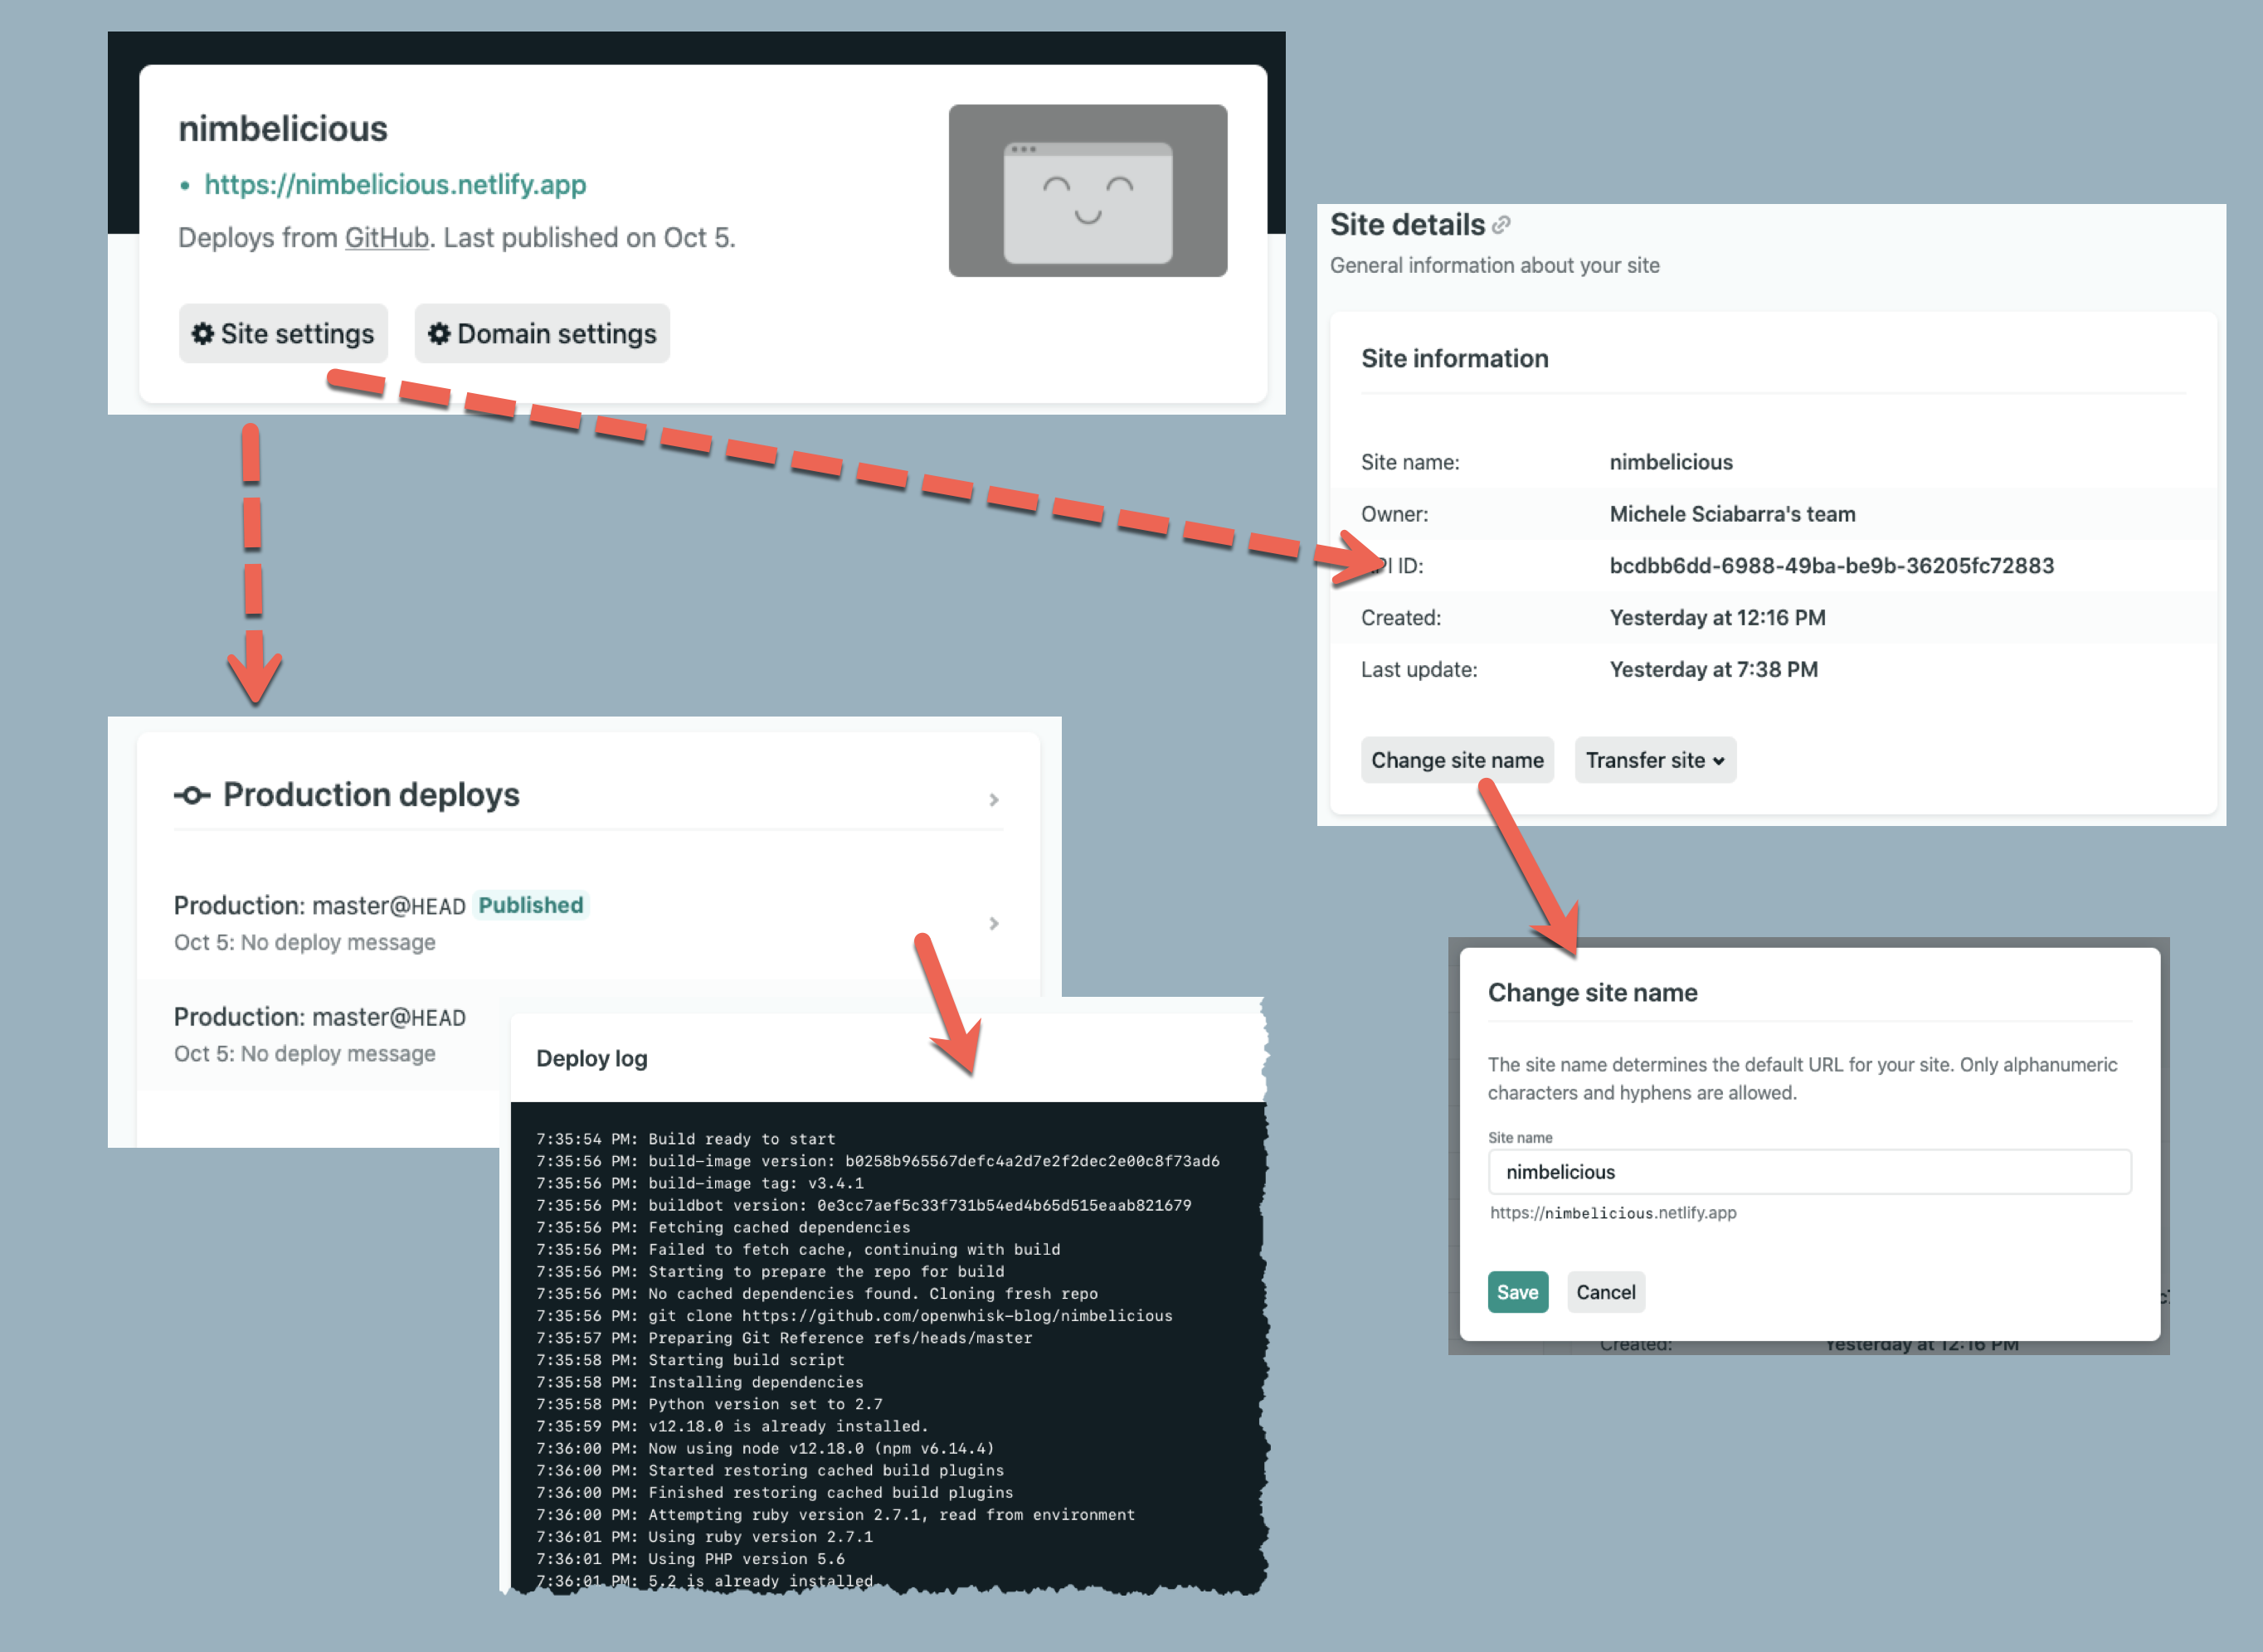 Figure 4
To change site name just login in Netlify, select your site and go in Site Settings. You will see a long list of options; we are interested in Site Details. In this form you can easily change the site name to something easier to remember. As long as you are not picking something already in use, you can choose the name you prefer in the domain netlify.app.
I do not cover here the multiple other options available (not all for free) like picking your own domain name. Last but not least I advise to check the publishing logs as it is pretty interesting to see what happens, and also very important to locate build problems.
In the same screen showing the publishing status of your web site, you can scroll down and find the list of the deployments. If you click on the arrow it will show the log of the deployment that you can inspect to look for errors. Every time you commit to github, it will trigger a build.
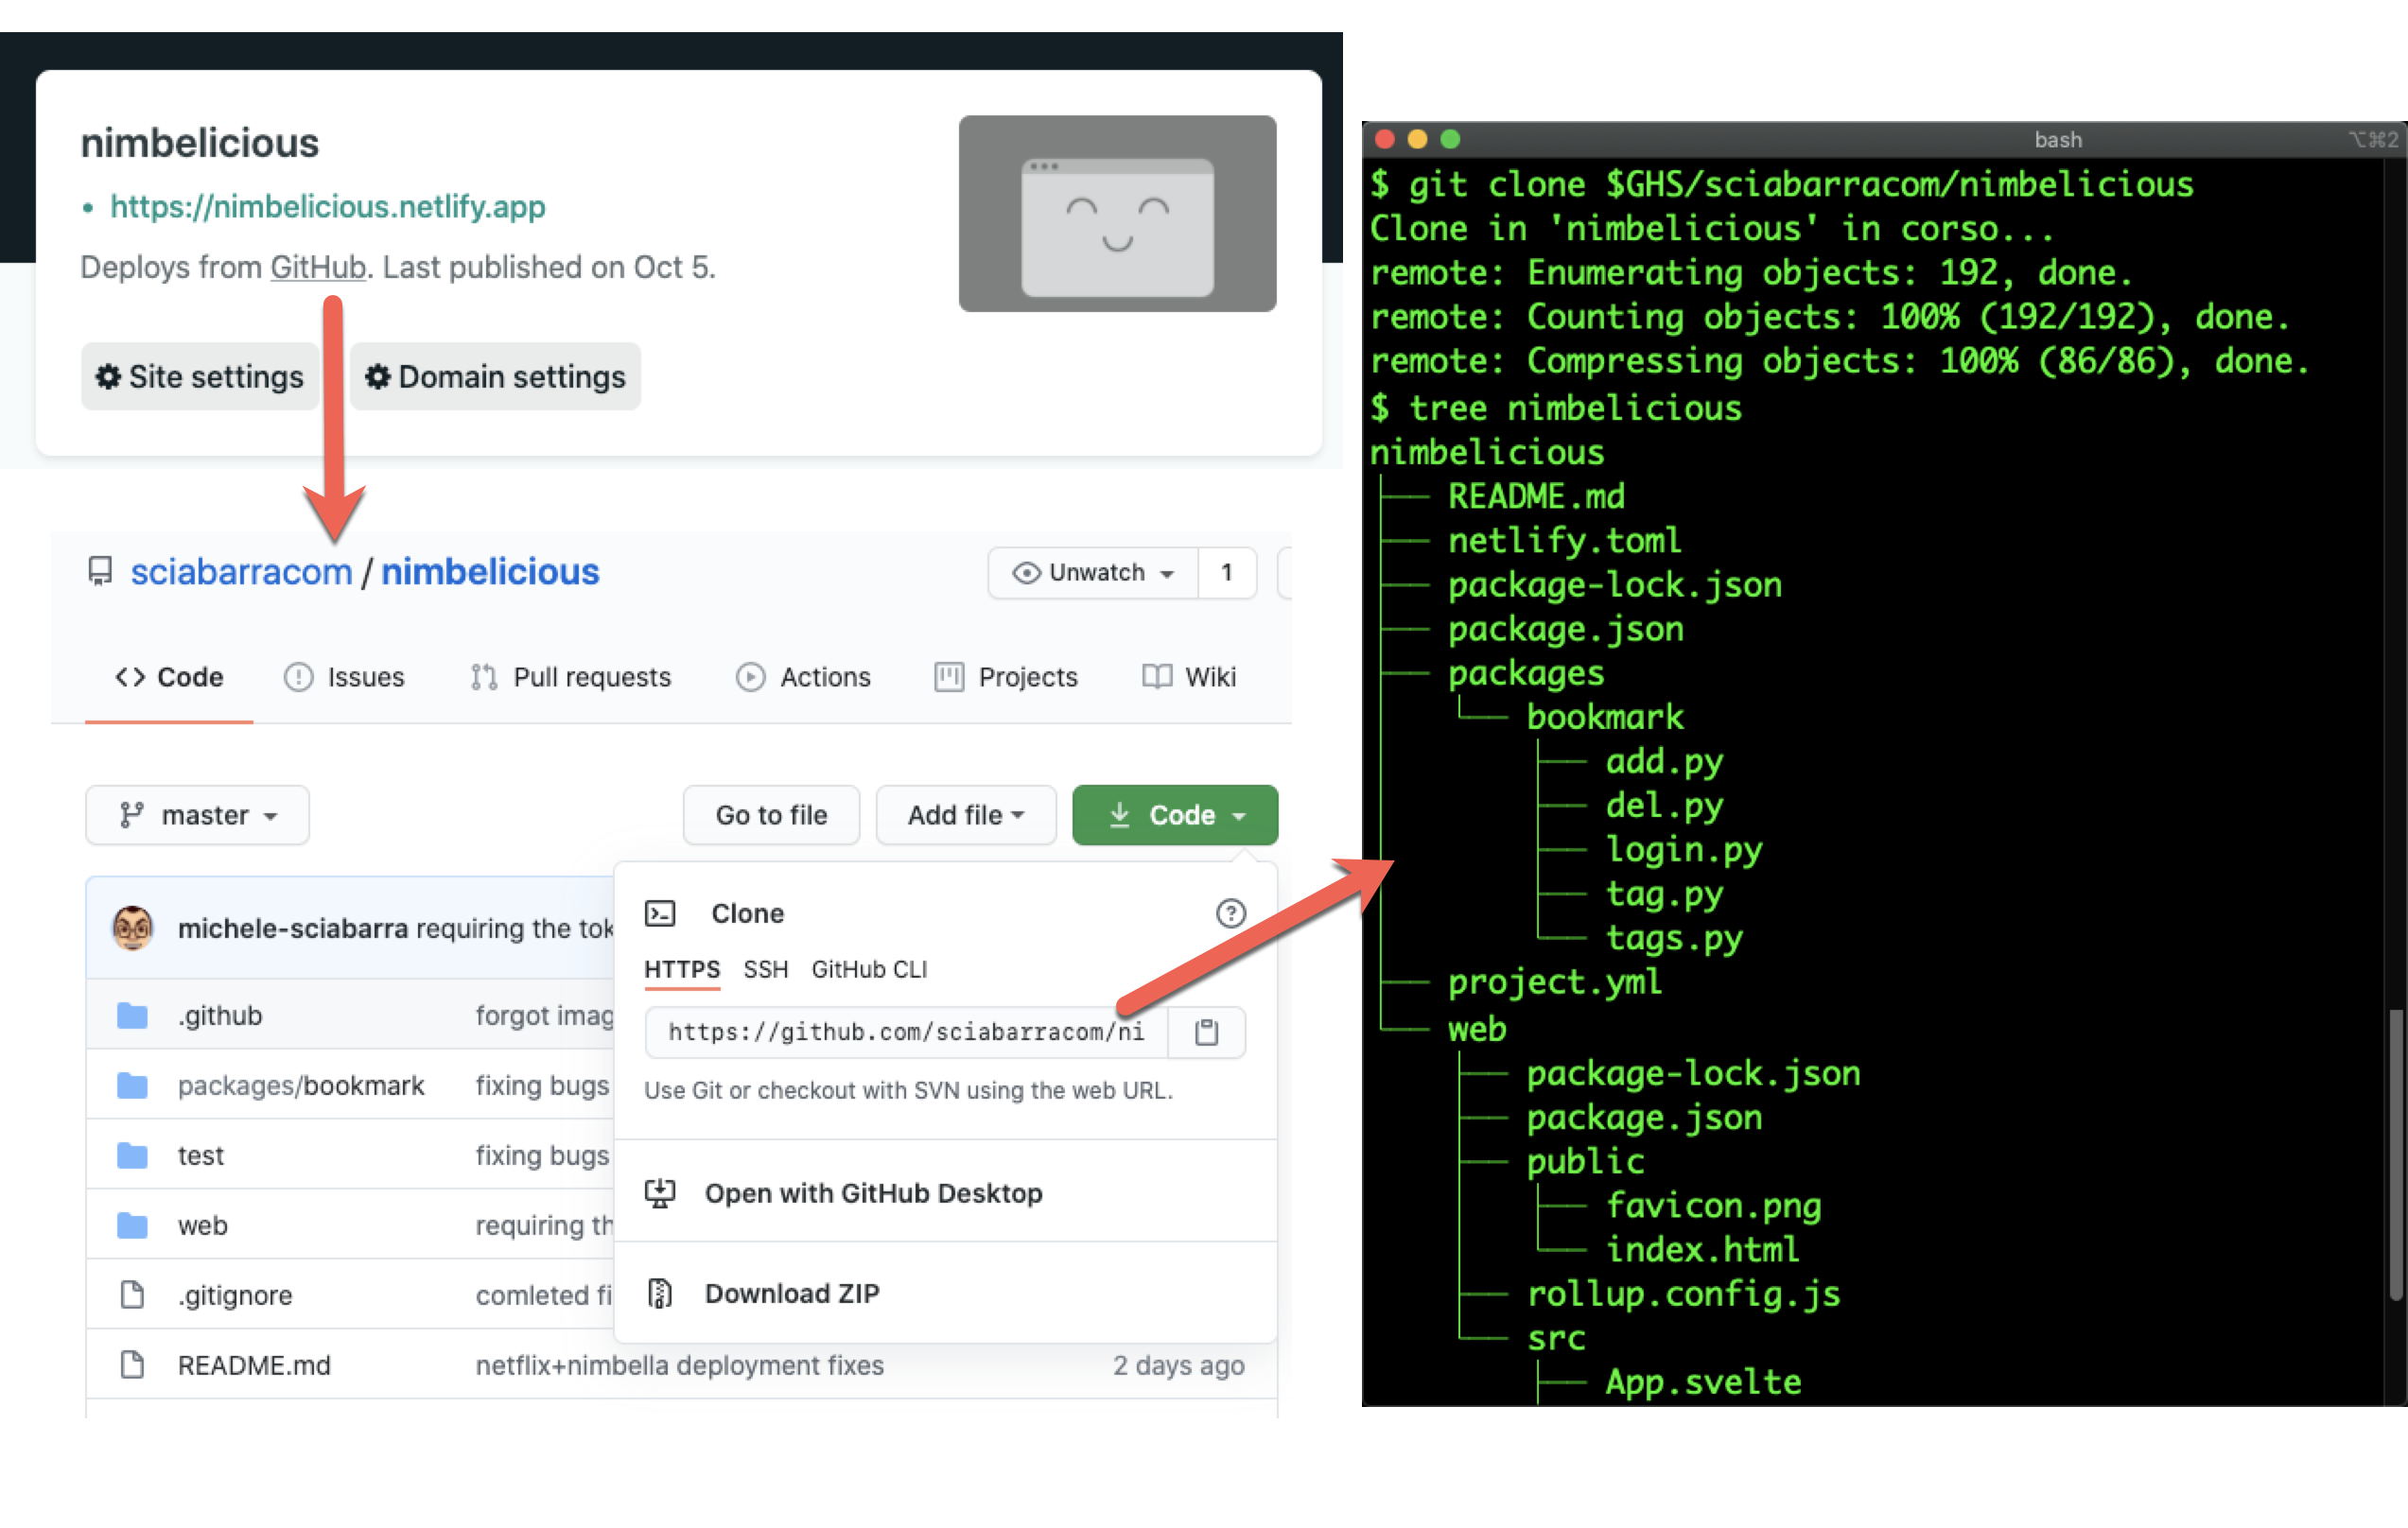 Figure 5
Since everything is source code I mention also how to edit and customise the application. If you click on the link GitHub as shown in Figure 5 it will bring you to the GitHub repository. Here you can see URSs to download the source code with git. Using the command:
git clone <your-repository-url>
You can grab the source code to edit it. I will not cover here the details of front-end and back-end development, but you have now here a complete serverless application that you can edit and modify as you like. You can use the Nimbella tools to develop, both the front-end and backend part, and test it.
It is of course recommended you use a different namespace for development to avoid affecting the published website. When you finished, just git push back your changes and application and the Netlify+Nimbella integration will update both the frontend and backend in production.
Conclusions
We just demonstrated how you can get a personal application and deploy in the cloud with a single click. Deploying an application in the cloud, even as simple as this, used to require a significant effort: you had to provision a server and manually install the code, or write deployment scripts using a DevOps automation tool.
Now you are experiencing a fully automated serverless approach, where deployment is one click away, and a full pipeline is in place. Changing code and content of your website, it is only one git push away, and you have to worry only of your code and not of the infrastructure.